AWSでシステムの環境を整える場合、最近ではPostgreSQLもRDS版があるのでEC2(Amazon Linux2)にPostgreSQLをインストールして使う機会が減りましたが、テストサーバー等で使う場合にはRDSは料金が高いのもあり、一つのEC2サーバーにデータベースサーバーも含めてオールインワンで環境を作ることもあるので、その構築手順を解説します。
作成する環境は以下の通りです。
EC2 : Amazon Linux 2
Tomcat : 9.0.24
Java JDK : 11.0.12 (Corretto11)
nginx : 1.12.2
PostgreSQL : 12
インストールしていく手順としては大きく分けて7ステップあります。
1.Amazon Linuxのインスタンス作成
2.Java(Amazon Corretto 11)のインストール
3.Tomcatのインストール
4.NginxとTomcatの連携
5.Nginxにドメイン設定
6.SSL(Let’s Encrypt) の設定
7.postgreSQLのインストール
作業する手数や確認項目は結構あるので頑張って進めていきましょう。
EC2は下記の構成で構築します
基本構成
Amazon Linux 2 AMI (HVM), SSD Volume Type
64ビット(x86)
t2.medium
CPUx2 Memory 4GByte
ストレージ 20GByte
セキュリティグループ(インバウンド)
| タイプ | プロトコル | ポート | CIDRブロック |
| SSH | TCP | 22 | 0.0.0.0/0 |
| HTTP | TCP | 80 | 0.0.0.0/0 |
| HTTPS | TCP | 443 | 0.0.0.0/0 |
| カスタムTCP | TCP | 8080 | 0.0.0.0/0 |
サーバーにSSHでログインしたらyumのアップデートを実行しましょう
$ sudo yum update -yyumのアップデートが完了したらサーバーの再起動
$ sudo shutdown -r nowAmazon Corretto 11をインストール
# sudo yum install java-11-amazon-corretto-headless

-------------------------------
~ インストールパッケージ表示 ~
-------------------------------
Install  1 Package (+8 Dependent packages)

Total download size: 167 M
Installed size: 314 M
Is this ok [y/d/N]: y ← インストールしてOK?と聞いてくるので「y」エンター

-------------------------------
~ 色々とログ出てきます ~
-------------------------------

Installed:
  java-11-amazon-corretto-headless.x86_64 1:11.0.12+7-1.amzn2

Dependency Installed:
  dejavu-fonts-common.noarch 0:2.33-6.amzn2          dejavu-sans-fonts.noarch 0:2.33-6.amzn2         fontconfig.x86_64 0:2.13.0-4.3.amzn2                fontpackages-filesystem.noarch 0:1.44-8.amzn2
  javapackages-tools.noarch 0:3.4.1-11.amzn2         libxslt.x86_64 0:1.1.28-6.amzn2                 python-javapackages.noarch 0:3.4.1-11.amzn2         python-lxml.x86_64 0:3.2.1-4.amzn2.0.3

Complete!
インストール場所は /usr/lib/jvm/にインストールされます。
インストールの確認をしてみましょう。
バージョン確認
# java -version
openjdk version "11.0.12" 2021-07-20 LTS
OpenJDK Runtime Environment Corretto-11.0.12.7.1 (build 11.0.12+7-LTS)
OpenJDK 64-Bit Server VM Corretto-11.0.12.7.1 (build 11.0.12+7-LTS, mixed mode)

デフォルトのJavaのプロバイダーを確認
# sudo alternatives --config java

There is 1 program that provides 'java'.

  Selection    Command
-----------------------------------------------
*+ 1           /usr/lib/jvm/java-11-amazon-corretto.x86_64/bin/java

Enter to keep the current selection[+], or type selection number: 1 ← 今回インストールした1を選択amazon-linux-extrasコマンドでインストールできるパッケージの確認をします。
# amazon-linux-extras | grep tomcat
 23  tomcat8.5                available    \
 52  tomcat9                  available    [ =stable ]
Tomcatのインストール
amazon-linux-extrasのパッケージ確認で表示された名称を指定してインストールコマンドを実行します。
今回はバージョン9をインストールします。
インストール実施
# sudo amazon-linux-extras install tomcat9

-------------------------------
~ インストールパッケージ表示 ~
-------------------------------
Install  1 Package (+24 Dependent packages)

Total download size: 13 M
Installed size: 22 M
Is this ok [y/d/N]: y ← インストールしてOK?と聞いてくるので「y」エンター

-------------------------------
~ 色々とログ出てきます ~
-------------------------------

 50  selinux-ng               available    [ =stable ]
 51  php8.0                   available    [ =stable ]
 52  tomcat9=latest           enabled      [ =stable ]
 53  unbound1.13              available    [ =stable ]
 54  mariadb10.5              available    [ =stable ]
 55  kernel-5.10              available    [ =stable ]
 56  redis6                   available    [ =stable ]
 57  ruby3.0                  available    [ =stable ]
 58  postgresql12             available    [ =stable ]
 59  postgresql13             available    [ =stable ]
 60  mock2                    available    [ =stable ]
 61  dnsmasq2.85              available    [ =stable ]

↑ 最後にこんな感じで表示されてインストール完了
インストールされたTomcatのバージョン確認
バージョン確認
# tomcat version
Server version: Apache Tomcat/9.0.41
Server built:   Mar 11 2021 20:51:42 UTC
Server number:  9.0.41.0
OS Name:        Linux
OS Version:     4.14.243-185.433.amzn2.x86_64
Architecture:   amd64
JVM Version:    11.0.12+7-LTS
JVM Vendor:     Amazon.com Inc.
Tomcatの起動
# sudo systemctl start tomcatサーバー起動時にTomcatが自動で起動できるように設定
# sudo systemctl enable tomcatTomcatのステータス確認
# sudo systemctl status tomcat
● tomcat.service - Apache Tomcat Web Application Container
   Loaded: loaded (/usr/lib/systemd/system/tomcat.service; enabled; vendor preset: disabled)
   Active: active (running) since Tue 2021-08-24 14:03:31 JST; 1 day 22h ago
 Main PID: 9865 (java)
   CGroup: /system.slice/tomcat.service
           └─9865 /usr/lib/jvm/jre/bin/java -Djavax.sql.DataSource.Factory=org.apache.commons.dbcp.BasicDataSourceFactory -classpath /usr/share/tomcat/bin/bootstrap.jar:/usr/share/tomcat/bin/tomcat-juli.jar...

Aug 26 06:55:09 ip-172-31-38-242.ap-northeast-1.compute.internal server[9865]: at org.apache.coyote.http11.Http11InputBuffer.parseRequestLine(Http11InputBuffer.java:417)
Aug 26 06:55:09 ip-172-31-38-242.ap-northeast-1.compute.internal server[9865]: at org.apache.coyote.http11.Http11Processor.service(Http11Processor.java:261)
Aug 26 06:55:09 ip-172-31-38-242.ap-northeast-1.compute.internal server[9865]: at org.apache.coyote.AbstractProcessorLight.process(AbstractProcessorLight.java:65)
Aug 26 06:55:09 ip-172-31-38-242.ap-northeast-1.compute.internal server[9865]: at org.apache.coyote.AbstractProtocol$ConnectionHandler.process(AbstractProtocol.java:888)
Aug 26 06:55:09 ip-172-31-38-242.ap-northeast-1.compute.internal server[9865]: at org.apache.tomcat.util.net.NioEndpoint$SocketProcessor.doRun(NioEndpoint.java:1597)
Aug 26 06:55:09 ip-172-31-38-242.ap-northeast-1.compute.internal server[9865]: at org.apache.tomcat.util.net.SocketProcessorBase.run(SocketProcessorBase.java:49)
Aug 26 06:55:09 ip-172-31-38-242.ap-northeast-1.compute.internal server[9865]: at java.base/java.util.concurrent.ThreadPoolExecutor.runWorker(ThreadPoolExecutor.java:1128)
Aug 26 06:55:09 ip-172-31-38-242.ap-northeast-1.compute.internal server[9865]: at java.base/java.util.concurrent.ThreadPoolExecutor$Worker.run(ThreadPoolExecutor.java:628)
Aug 26 06:55:09 ip-172-31-38-242.ap-northeast-1.compute.internal server[9865]: at org.apache.tomcat.util.threads.TaskThread$WrappingRunnable.run(TaskThread.java:61)
Aug 26 06:55:09 ip-172-31-38-242.ap-northeast-1.compute.internal server[9865]: at java.base/java.lang.Thread.run(Thread.java:829)
インストールフォルダの確認
# ls -l /usr/share/tomcat/

drwxr-xr-x  2 root root    102 Aug 24 09:17 bin
lrwxrwxrwx  1 root tomcat   11 Aug 24 09:17 conf -> /etc/tomcat
lrwxrwxrwx  1 root tomcat   22 Aug 24 09:17 lib -> /usr/share/java/tomcat
lrwxrwxrwx  1 root tomcat   15 Aug 24 09:17 logs -> /var/log/tomcat
lrwxrwxrwx  1 root tomcat   22 Aug 24 09:17 temp -> /var/cache/tomcat/temp
lrwxrwxrwx  1 root tomcat   23 Aug 24 09:17 webapps -> /var/lib/tomcat/webapps
lrwxrwxrwx 1 root tomcat 22 Aug 24 09:17 work -> /var/cache/tomcat/work/usr/share/tomcat/以下フォルダに各シンボリックリンクが作成されているのが分かります。
上記の構成ではwarアプリケーションをデプロイするフォルダは/var/lib/tomcat/webappsです。
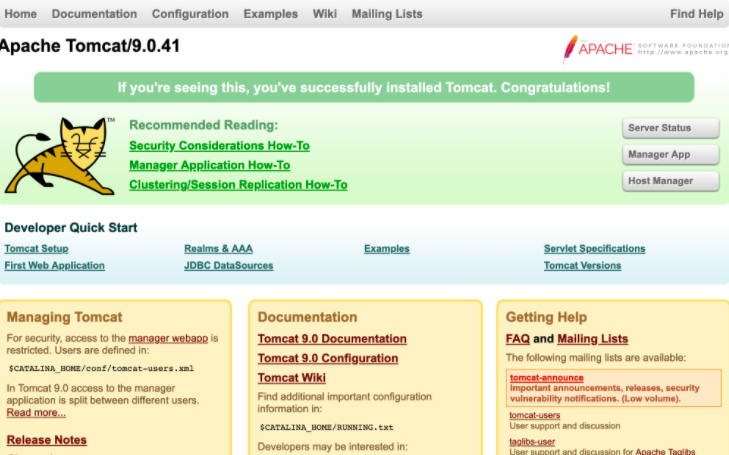
動作確認
ブラウザからhttp://EC2インスタンスのIPアドレス:8080にアクセスするとTomcatの画面が表示されるのですが、amazon-linux-extrasコマンドでインストールした場合はwebappsフォルダ内は空っぽ状態となっているので、この画面はブラウザからアクセスしても見れません。
amazon-linux-extrasコマンドでインストールできるパッケージの確認をします。
# amazon-linux-extras | grep nginx
 38  nginx1                   available    [ =stable ]
Nginxのインストール
amazon-linux-extrasのパッケージ確認で表示された名称を指定してインストールコマンドを実行します。
インストール実施
# sudo amazon-linux-extras install nginx1

-------------------------------
~ インストールパッケージ表示 ~
-------------------------------

nstall  1 Package (+4 Dependent packages)

Total download size: 2.3 M
Installed size: 6.6 M
Is this ok [y/d/N]: y ← インストールしてOK?と聞いてくるので「y」エンター

-------------------------------
~ 色々とログ出てきます ~
-------------------------------

 35  kernel-ng                available    [ =stable ]
 36  BCC                      available    [ =0.x  =stable ]
 37  mono                     available    [ =5.x  =stable ]
 38  nginx1=latest            enabled      [ =stable ]
 39  ruby2.6                  available    [ =2.6  =stable ]

↑ 最後にこんな感じで表示されてインストール完了
インストールされたNginxのバージョン確認
バージョン確認
# nginx -v
nginx version: nginx/1.20.0
Nginxの設定
初期設定ファイルのバックアップ
# sudo cp -a /etc/nginx/nginx.conf /etc/nginx/nginx.conf.back
Nginxの起動
# sudo systemctl start nginxサーバー起動時にNginxが自動で起動できるように設定
# sudo systemctl enable nginx
Created symlink from /etc/systemd/system/multi-user.target.wants/nginx.service to /usr/lib/systemd/system/nginx.service.
Nginxのステータス確認
# systemctl status nginx

● nginx.service - The nginx HTTP and reverse proxy server
   Loaded: loaded (/usr/lib/systemd/system/nginx.service; enabled; vendor preset: disabled)
   Active: active (running) since Tue 2021-08-24 09:14:34 JST; 23s ago
 Main PID: 3485 (nginx)
   CGroup: /system.slice/nginx.service
           ├─3485 nginx: master process /usr/sbin/nginx
           ├─3486 nginx: worker process
           └─3487 nginx: worker process

Aug 24 09:14:34 ip-172-31-38-242.ap-northeast-1.compute.internal systemd[1]: Starting The nginx HTTP and reverse proxy server...
Aug 24 09:14:34 ip-172-31-38-242.ap-northeast-1.compute.internal nginx[3481]: nginx: the configuration file /etc/nginx/nginx.conf syntax is ok
Aug 24 09:14:34 ip-172-31-38-242.ap-northeast-1.compute.internal nginx[3481]: nginx: configuration file /etc/nginx/nginx.conf test is successful
Aug 24 09:14:34 ip-172-31-38-242.ap-northeast-1.compute.internal systemd[1]: Started The nginx HTTP and reverse proxy server.
動作確認
ブラウザから下記URLにアクセスします
http://EC2インスタンスのIPアドレス
welcome to nginx on Amazon Linxu!という画面が表示されたら完了です。

serverブロックにlocation記述を下記のように追加することで「tomcat-web」のルートアクセスをtomcatのwebappsにデプロイした「tomcat-app」にパススルーされるようになります。
server {
    location /tomat-web/ {
        proxy_pass http://127.0.0.1:8080/tomcat-app/;
    }
}
nginxの再起動をしたらproxy_passの設定が反映されます
$ sudo systemctl restart nginx/etc/nginx/conf.dフォルダ内にドメイン名.confファイルを作成します。
( ドメイン名.conf でなくてもファイル名のポストフィックスが.confであればファイル名はなんでもいいのですが、ドメイン名のファイル名にしておくと判別しやすいです)
# vi /etc/nginx/conf.d/yourdomain.com.conf server {
server_name yourdomain.com;
server_tokens off;
charset UTF-8;
charset_types application/json;
real_ip_header X-Forwarded-For;
location /app-api/ {
proxy_pass http://127.0.0.1:8080/app-api/;
}
}nginxの設定ファイルチェック
$ nginx -t -c /etc/nginx/conf.d/yourdomain.com.conf Let’s EncryptでHTTPSを有効にするツールであるCertbotを使うためのEPEL7パッケージをインストールします。
EPEL をダウンロード
$ sudo wget -r --no-parent -A 'epel-release-*.rpm' http://dl.fedoraproject.org/pub/epel/7/x86_64/Packages/e/

FINISHED --2021-08-24 13:31:14--
Total wall clock time: 3.3s
Downloaded: 10 files, 384K in 0.5s (845 KB/s)
EPEL インストール
$ sudo rpm -Uvh dl.fedoraproject.org/pub/epel/7/x86_64/Packages/e/epel-release-*.rpm

warning: dl.fedoraproject.org/pub/epel/7/x86_64/Packages/e/epel-release-7-13.noarch.rpm: Header V4 RSA/SHA256 Signature, key ID 352c64e5: NOKEY
Preparing...                          ################################# [100%]
Updating / installing...
   1:epel-release-7-13                ################################# [100%]
EPELを有効化
$ sudo yum-config-manager --enable epel*EPELの有効化を確認
$ sudo yum repolist all

........
........
epel/x86_64                                                                        Extra Packages for Enterprise Linux 7 - x86_64                                                             enabled: 13,414+224
epel-debuginfo/x86_64                                                              Extra Packages for Enterprise Linux 7 - x86_64 - Debug                                                     enabled:      2,876
epel-source/x86_64                                                                 Extra Packages for Enterprise Linux 7 - x86_64 - Source                                                    enabled:          0
epel-testing/x86_64                                                                Extra Packages for Enterprise Linux 7 - Testing - x86_64                                                   enabled:        611
epel-testing-debuginfo/x86_64                                                      Extra Packages for Enterprise Linux 7 - Testing - x86_64 - Debug                                           enabled:         64
epel-testing-source/x86_64                                                         Extra Packages for Enterprise Linux 7 - Testing - x86_64 - Source                                          enabled:          0
........
........
repolist: 43,410
上記のようにepelの行が表示されていたらOK
Certbotのインストール
$ sudo yum install certbot-nginx

........
........
Total                                                                                                                                                                            6.4 MB/s | 4.4 MB  00:00:00
Retrieving key from file:///etc/pki/rpm-gpg/RPM-GPG-KEY-EPEL-7
Importing GPG key 0x352C64E5:
 Userid     : "Fedora EPEL (7) <epel@fedoraproject.org>"
 Fingerprint: 91e9 7d7c 4a5e 96f1 7f3e 888f 6a2f aea2 352c 64e5
 Package    : epel-release-7-13.noarch (installed)
 From       : /etc/pki/rpm-gpg/RPM-GPG-KEY-EPEL-7
Is this ok [y/N]: y


Installed:
  python2-certbot-nginx.noarch 0:1.11.0-1.el7

Dependency Installed:
  audit-libs-python.x86_64 0:2.8.1-3.amzn2.1        certbot.noarch 0:1.11.0-1.el7                      checkpolicy.x86_64 0:2.5-6.amzn2                       libcgroup.x86_64 0:0.41-21.amzn2
  libselinux-python.x86_64 0:2.5-12.amzn2.0.2       libsemanage-python.x86_64 0:2.5-11.amzn2           policycoreutils-python.x86_64 0:2.5-22.amzn2           pyOpenSSL.x86_64 0:0.13.1-3.amzn2.0.2
  pyparsing.noarch 0:1.5.6-9.amzn2                  python-IPy.noarch 0:0.75-6.amzn2.0.1               python-ndg_httpsclient.noarch 0:0.3.2-1.el7            python-requests-toolbelt.noarch 0:0.8.0-3.el7
  python-zope-component.noarch 1:4.1.0-5.el7        python-zope-event.noarch 0:4.0.3-2.el7             python-zope-interface.x86_64 0:4.0.5-4.amzn2.0.2       python2-acme.noarch 0:1.11.0-1.el7
  python2-certbot.noarch 0:1.11.0-1.el7             python2-configargparse.noarch 0:0.11.0-2.el7       python2-distro.noarch 0:1.2.0-3.el7                    python2-future.noarch 0:0.18.2-2.el7
  python2-josepy.noarch 0:1.3.0-2.el7               python2-mock.noarch 0:1.0.1-10.el7                 python2-parsedatetime.noarch 0:2.4-6.el7               python2-pyrfc3339.noarch 0:1.1-3.el7
  python2-six.noarch 0:1.9.0-0.el7                  pytz.noarch 0:2016.10-2.amzn2.0.1                  setools-libs.x86_64 0:3.3.8-2.amzn2.0.2

Complete!
Certbotの実行
$ sudo certbot --nginxSaving debug log to /var/log/letsencrypt/letsencrypt.log
Plugins selected: Authenticator nginx, Installer nginx
Enter email address (used for urgent renewal and security notices)
(Enter 'c' to cancel): - - - - - - - - - - - - - - - - - - - - - - - - - - - - - - - - - - - - - - - -
Please read the Terms of Service at
https://letsencrypt.org/documents/LE-SA-v1.2-November-15-2017.pdf. You must
agree in order to register with the ACME server. Do you agree?
- - - - - - - - - - - - - - - - - - - - - - - - - - - - - - - - - - - - - - - -
(Y)es/(N)o: - - - - - - - - - - - - - - - - - - - - - - - - - - - - - - - - - - - - - - - -
Would you be willing, once your first certificate is successfully issued, to
share your email address with the Electronic Frontier Foundation, a founding
partner of the Let's Encrypt project and the non-profit organization that
develops Certbot? We'd like to send you email about our work encrypting the web,
EFF news, campaigns, and ways to support digital freedom.
- - - - - - - - - - - - - - - - - - - - - - - - - - - - - - - - - - - - - - - -
(Y)es/(N)o
Account registered.Which names would you like to activate HTTPS for?
- - - - - - - - - - - - - - - - - - - - - - - - - - - - - - - - - - - - - - - -
1: yourdomain.com
- - - - - - - - - - - - - - - - - - - - - - - - - - - - - - - - - - - - - - - -
Select the appropriate numbers separated by commas and/or spaces, or leave input
blank to select all options shown (Enter 'c' to cancel):
Requesting a certificate for yourdomain.com
Performing the following challenges:
http-01 challenge for yourdomain.com
Waiting for verification...
Cleaning up challenges
Deploying Certificate to VirtualHost /etc/nginx/conf.d/yourdomain.com.conf
Redirecting all traffic on port 80 to ssl in /etc/nginx/conf.d/yourdomain.com.conf
- - - - - - - - - - - - - - - - - - - - - - - - - - - - - - - - - - - - - - - -
Congratulations! You have successfully enabled https://yourdomain.com
- - - - - - - - - - - - - - - - - - - - - - - - - - - - - - - - - - - - - - - -
Subscribe to the EFF mailing list (email: yourname@yourdomain.com).
IMPORTANT NOTES:
- Congratulations! Your certificate and chain have been saved at:
/etc/letsencrypt/live/yourdomain.com/fullchain.pem
Your key file has been saved at:
/etc/letsencrypt/live/yourdomain.com/privkey.pem
Your certificate will expire on 2021-11-22. To obtain a new or
tweaked version of this certificate in the future, simply run
certbot again with the "certonly" option. To non-interactively
renew *all* of your certificates, run "certbot renew"
- If you like Certbot, please consider supporting our work by:
Donating to ISRG / Let's Encrypt: https://letsencrypt.org/donate
Donating to EFF: https://eff.org/donate-le
これで Let’s EncryptによるSSL設定が完了したので、ブラウザから「https://設定したドメイン」にアクセスしてSSL通信でブラウザ表示できたら完了です。
Let’s Encrypt の自動更新
無料で SSL/TLS 証明書を発行できる Let’s Encrypt の証明書有効期限は3ヶ月間なので、cronで自動的に更新するように設定を行います。
$ sudo crontab -e0 2,14 * * * root certbot renew --no-self-upgrade && systemctl restart nginx毎日、02:00 と 14:00 にコマンドが実行されるようにスケジュールします。
Certbotの開発者によると、更新を確認するためのコマンドを少なくとも毎日 2 回実行することを推奨しています。これにより、侵害されていることがわかった証明書は取り消されて置き換えられます。
cronの再起動で設定が完了です
$ sudo systemctl restart crondamazon-linux-extrasコマンドでインストールできるパッケージの確認をします。
# amazon-linux-extras | grep  postgresql
  5  postgresql9.6            available    \
  6  postgresql10             available    [ =10  =stable ]
 41  postgresql11             available    [ =11  =stable ]
 58  postgresql12             available    [ =stable ]
 59  postgresql13             available    [ =stable ]
yumでインストールできるバージョンを確認してみます
yum info postgresql
Loaded plugins: extras_suggestions, langpacks, priorities, update-motd
Available Packages
Name        : postgresql
Arch        : x86_64
Version     : 9.2.24
Release     : 6.amzn2
Size        : 3.0 M
Repo        : amzn2-core/2/x86_64
Summary     : PostgreSQL client programs
URL         : http://www.postgresql.org/
License     : PostgreSQL
Description : PostgreSQL is an advanced Object-Relational database management system (DBMS).
            : The base postgresql package contains the client programs that you'll need to
            : access a PostgreSQL DBMS server, as well as HTML documentation for the whole
            : system.  These client programs can be located on the same machine as the
            : PostgreSQL server, or on a remote machine that accesses a PostgreSQL server
            : over a network connection.  The PostgreSQL server can be found in the
            : postgresql-server sub-package.
デフォルトではver9系となっているので、yumでpostgresql-12パッケージのインストールができるように設定を追加します
$ sudo vi /etc/yum.repos.d/pgdg-redhat-all.repo/etc/yum.repos.d/pgdg-redhat-all.repoファイルに下記を記述
[pgdg12]
name=PostgreSQL 12 for RHEL/CentOS 7 - x86_64
baseurl=https://download.postgresql.org/pub/repos/yum/12/redhat/rhel-7-x86_64
enabled=1
gpgcheck=0
パッケージインデックスファイルを更新
$ sudo yum makecacheインストールの実施
インストール実施
$ sudo yum install postgresql12 postgresql12-server

バージョン確認
$ su - postgres
$ psql --version
psql (PostgreSQL) 12.7
initdbコマンドでデータベースの初期化
デフォルトのエンコーディングをUTF-8、ロケールをCに指定してinitdbを実行します。
Amazon Linux2の場合はログインユーザのロケール情報が英語圏となっているので、ロケールを指定しないとen_US.UTF-8になってしまい、日本語のデータのソートや抽出がうまくいかないケースになります。
initdbへの引数はコマンドラインから直接指定できないようなので、PGSETUP_INITDB_OPTIONS環境変数経由で指定します。
$ PGSETUP_INITDB_OPTIONS='--encoding=UTF-8 --locale=C' sudo /usr/pgsql-12/bin/postgresql-12-setup initdb
Initializing database ... OKinitdbで作成されるファイル類は/var/lib/pgsql/12以下に作成されます
自動起動設定
# sudo systemctl enable --now postgresql-12
Created symlink from /etc/systemd/system/multi-user.target.wants/postgresql-12.service to /usr/lib/systemd/system/postgresql-12.service.
ステータスの確認
systemctl status postgresql-12
● postgresql-12.service - PostgreSQL 12 database server
   Loaded: loaded (/usr/lib/systemd/system/postgresql-12.service; enabled; vendor preset: disabled)
   Active: active (running) since Tue 2021-08-24 10:09:52 JST; 26s ago
     Docs: https://www.postgresql.org/docs/12/static/
  Process: 6383 ExecStartPre=/usr/pgsql-12/bin/postgresql-12-check-db-dir ${PGDATA} (code=exited, status=0/SUCCESS)
 Main PID: 6389 (postmaster)
   CGroup: /system.slice/postgresql-12.service
           ├─6389 /usr/pgsql-12/bin/postmaster -D /var/lib/pgsql/12/data/
           ├─6391 postgres: logger
           ├─6393 postgres: checkpointer
           ├─6394 postgres: background writer
           ├─6395 postgres: walwriter
           ├─6396 postgres: autovacuum launcher
           ├─6397 postgres: stats collector
           └─6398 postgres: logical replication launcher

Aug 24 10:09:52 ip-172-31-38-242.ap-northeast-1.compute.internal systemd[1]: Starting PostgreSQL 12 database server...
Aug 24 10:09:52 ip-172-31-38-242.ap-northeast-1.compute.internal postmaster[6389]: 2021-08-24 10:09:52.820 JST [6389] LOG:  starting PostgreSQL 12.8 on x86_64-pc-linux-gnu, compiled by gcc (GCC) 4...4), 64-bit
Aug 24 10:09:52 ip-172-31-38-242.ap-northeast-1.compute.internal postmaster[6389]: 2021-08-24 10:09:52.820 JST [6389] LOG:  listening on IPv4 address "127.0.0.1", port 5432
Aug 24 10:09:52 ip-172-31-38-242.ap-northeast-1.compute.internal postmaster[6389]: 2021-08-24 10:09:52.821 JST [6389] LOG:  listening on Unix socket "/var/run/postgresql/.s.PGSQL.5432"
Aug 24 10:09:52 ip-172-31-38-242.ap-northeast-1.compute.internal postmaster[6389]: 2021-08-24 10:09:52.823 JST [6389] LOG:  listening on Unix socket "/tmp/.s.PGSQL.5432"
Aug 24 10:09:52 ip-172-31-38-242.ap-northeast-1.compute.internal postmaster[6389]: 2021-08-24 10:09:52.834 JST [6389] LOG:  redirecting log output to logging collector process
Aug 24 10:09:52 ip-172-31-38-242.ap-northeast-1.compute.internal postmaster[6389]: 2021-08-24 10:09:52.834 JST [6389] HINT:  Future log output will appear in directory "log".
Aug 24 10:09:52 ip-172-31-38-242.ap-northeast-1.compute.internal systemd[1]: Started PostgreSQL 12 database server.
postgresqlユーザーのパスワード設定
$ su - postgresql
$ psql -c "alter user postgres with password 'パスワード'"
psql: /usr/pgsql-12/lib/libpq.so.5: no version information available (required by psql)
ALTER ROLE


設定したパスワードでログイン
$ psql -U postgres -W
Password:
psql (12.7, server 12.8)
Type "help" for help.
postgres=#

データベースを表示
postgres=# \l
                                    List of databases
     Name      |  Owner   | Encoding |   Collate   |    Ctype    |   Access privileges
---------------+----------+----------+-------------+-------------+-----------------------
 postgres      | postgres | UTF8     | en_US.UTF-8 | en_US.UTF-8 |
 template0     | postgres | UTF8     | en_US.UTF-8 | en_US.UTF-8 | =c/postgres          +
               |          |          |             |             | postgres=CTc/postgres
 template1     | postgres | UTF8     | en_US.UTF-8 | en_US.UTF-8 | =c/postgres          +
               |          |          |             |             | postgres=CTc/postgres
(3 rows)
トンネル接続で接続できるように設定
$ sudo vi /var/lib/pgsql/12/data/pg_hba.confpeer認証は、OSにログインしているユーザIDと、PostgreSQLユーザIDを取得し、両者が一致するかチェックする方式となりlocalhostからのみの認証となります。
外部からのログインを許可する場合は認証方式をmd5に変更します。
変更前
# TYPE  DATABASE        USER            ADDRESS                 METHOD

# "local" is for Unix domain socket connections only
local   all             all                                     peer
# IPv4 local connections:
host    all             all             127.0.0.1/32            ident
# IPv6 local connections:
host    all             all             ::1/128                 ident
変更後
# TYPE  DATABASE        USER            ADDRESS                 METHOD

# "local" is for Unix domain socket connections only
local   all             all                                     md5
# IPv4 local connections:
host    all             all             127.0.0.1/32            md5
# IPv6 local connections:
host    all             all             ::1/128                 md5
設定を反映するために再起動
$ sudo systemctl restart postgresql-12以上でAmazon Linux2にNginx+Tomcat+PostgreSQLの環境を構築する手順の完了です。おつかれさまでした!!